Last updated November 18, 2026



Free written scope consultation - allowances, timeline, and change-order rules on paper before a single trade is scheduled
Driveway & Pavers Troubleshooting: Common Problems and How to Fix Them
If your pavers rock when you step on them but look fine from the street, you don’t have a paver problem. You have a base problem, and sealing over it will make it worse. That single distinction explains why so many homeowners in Paradise spend money on the wrong repair, then call us a year later with the same stones moving underfoot. Nine out of ten paver complaints we look at trace back to a rushed base layer, not the pavers themselves. This guide walks you through the failure modes we see most in Paradise, Nevada, teaches you to diagnose which one you actually have before you spend a dollar, and shows you what a correct repair looks like versus the fix that buys a few months.
Quick Answer
Most sunken, rocking, or shifting pavers are caused by a base that wasn’t compacted deep enough or edged correctly, not by the pavers themselves. Diagnose the failure first with a tap test and a look at the edge restraints. Spot repairs work when one or two stones are affected; full base remediation is the honest answer when a whole section moves. Sealing a moving paver hides the symptom and traps the problem.
Styles & brands we work with
- Kitchen remodeling
- Bathroom remodeling
- Home additions & ADU
- Roofing
- Windows & doors
- Driveway & pavers
- Fence
Table of Contents
- The Tap Test: Mapping Hollow Spots Before You Spend a Dime
- Efflorescence vs. Mold vs. Mineral Staining
- Why Edge Restraints Fail in Paradise Heat
- Ant and Weed Infiltration: Which Joint Sand Actually Holds
- Drainage Problem or Compaction Problem?
- Spot Repair vs. Full Base Remediation
- What a Correct Base Layer Looks Like
The Tap Test: Mapping Hollow Spots Before You Spend a Dime
Before any contractor gives you a number, do this yourself. Take a rubber mallet and tap every paver in the suspect area, listening for a change in tone. A solid paver gives a dull thud; a paver sitting over a void rings hollow or sounds tinny. Walk the whole driveway in a grid. Chalk-mark every hollow stone. Your marks will tell you more than any phone quote, because they map the footprint of the actual problem.
What the map means:
- One or two hollow stones, the rest solid: a spot repair. The base failed locally, usually where a car tire parks or where water pools.
- A hollow patch in line with traffic or a low corner: probably a compaction problem under that specific path. Same story, contained area.
- Hollow stones scattered across the whole driveway: the base wasn’t compacted in lifts at installation. Sealing won’t help. The pavers need to come up.
- Hollow stones ringing a drainage line, a downspout, or the lowest point of the slope: a drainage problem. Read the next-to-last section carefully.
We use the tap test on almost every driveway call we run in Paradise. It costs nothing and it separates a $200 touch-up from a job that needs real base work. Do it before anyone quotes you, then compare their recommendation to what the mallet told you. If they promise a ten-minute fix on a driveway that rang hollow in twenty places, that’s your answer about the outfit.
Efflorescence vs. Mold vs. Mineral Staining
You’ve got a white or chalky film on your pavers and you’re reaching for a pressure washer. Stop. The treatment you apply depends on what the stain actually is, and applying the wrong one can etch the paver face permanently. That etching means every future cleaning makes the surface worse, and the only fix is replacement.
Efflorescence
A powdery white bloom that appears on the paver surface and brushes off with light finger pressure is efflorescence. It’s mineral salts migrating from the mortar or base to the surface as moisture moves through the pavement. It’s cosmetic and it’s seasonal, common in Paradise after our monsoon-season storms push water into the pavement and then dry out. Efflorescence that keeps coming back in the same spot is telling you moisture is trapped. Don’t seal it. Find the water source first.
Mold or mildew
Dark green or black film, usually in shaded areas and along joints where organic debris collects, is mold or mildew. It needs moisture and food (leaves, pollen, dust) to grow. A simple mix of dish soap and warm water with a soft brush handles most of it. Avoid straight bleach; it kills the mold but leaves salts behind that feed the next bloom.
Mineral or rust staining
Orange-brown or reddish staining comes from sprinkler water, iron-rich well water, or metal edging that has rusted. This is not efflorescence and it’s not mold, and neither of the ordinary treatments will touch it. It usually needs a poultice or a specific rust remover matched to the paver type. In Paradise we see this often on driveways with older galvanized edging that has begun to rust out, or with landscape irrigation spraying directly onto pavers.
Match the treatment to the stain, and if you can’t decide which one you’re looking at, test in a small hidden spot first. On the wrong stain, the wrong product etches in seconds.
Why Edge Restraints Fail in Paradise Heat
The edge restraint is the concrete or plastic border that holds the outer course of pavers in place. It’s the least glamorous part of a driveway installation and the first thing to let go. In Paradise, the pattern is predictable: the paver field expands under summertime heat, the plastic edge restraint lifts or breaks, the paving stones creep outward a quarter inch at a time, and every joint in from the edge opens up. Once the joints open, sand drains out, the base below stops being protected, and the whole pavement starts to go.
A repair that will fail again in six months looks like this:
- Pushing the pavers back into place and dumping sand in the joints
- Running a bead of silicone along the edge and calling it done
- Plastic edge clips that are the same type and same age as the ones that just failed
A repair that lasts:
- Remove pavers one course in from the edge.
- Excavate a proper trench along the outside edge, down to compacted subgrade.
- Pour a concrete edge restraint, reinforced, at least 6 inches wide and 8 inches deep, with proper slope so water leaves.
- Re-set the pavers against the new restraint while the concrete is still wet, then re-sand the joints once cured.
That concrete edge, cured correctly, is what a driveway in the summer Paradise heat actually needs. If you take one sentence from this guide: edge failures are never about the pavers, they’re about what’s holding the edges in.
Ant and Weed Infiltration: Which Joint Sand Actually Holds
The ant problem and the weed problem are the same problem. Pavers have thousands of feet of joint, and every inch of that joint is a highway for insects and a seedbed for weeds if the joint material can’t hold up to our climate. Ants don’t create the failure; they exploit it. The looser the joint sand, the more ants you’ll see, and the more weed seeds find a place to root.
What fails fast
- Ordinary drop-and-sweep sand: ant colonies move it out of the joints within a season.
- Premature sealing over a joint that still had loose sand: cracked sealer, exposed joints, worse than before.
- Box-store polymeric sand swept dry into wide joints without proper activation: fails to cure correctly and turns into loose crumbs.
What holds up
In our experience in Paradise, high-solid-content polymeric sand, fully activated per the manufacturer’s wetting instructions and installed when pavers are dry and at the correct moisture, is what you want. That means the second generation poly-sands from the major brands. Quikrete and Sakrete both make poly-sand products we install routinely. The key is the activation step – that first misting has to be done properly or the whole thing fails. If your contractor sweeps and leaves, the joint sand won’t hold through a monsoon season.
Weed control is genuinely handled by line-trimming, hand-pulling before the seed heads form, and a joint material that doesn’t crack. Sealing on top of healthy joints slows infiltration but does not replace it. If you’re being told that a sealer alone will keep ants and weeds out, ask what’s happening in the joints underneath.
Drainage Problem or Compaction Problem?
This is the diagnosis that makes or breaks the repair budget. Both problems look identical from across the street – a sunken section in the driveway – and both produce hollow-sounding pavers when you tap them. The repair, though, is completely different. If you fix the wrong one, the pavement re-fails the following season.
How to tell them apart
- Look at the slope. Use a 4-foot level. Water should run off pavers at about 1.5% to 2%. If the sunken section is at a low point or if water can pool there during an irrigation cycle, you’re looking at drainage.
- Look at the surrounding ground. Sunken section next to a low planter bed, a downspout, or the edge of a slope? Drainage. That water has to be moving somewhere and it’s moving under your pavers.
- Look at the sink pattern. A sunken patch that lines up with the wheel path of a parked car, surrounded by otherwise-flat pavement, is compaction. That specific spot didn’t get enough compaction at installation, and a parked car found it.
- Look at timing. Did the sink appear after a monsoon storm or after we ran the sprinklers heavy for a month? Drainage. Did it develop slowly over every summer? Compaction.
What each repair involves
A drainage problem needs a water-management answer: regrade the area, add a drain or a swale, redirect the downspout, tune the irrigation so it isn’t spraying onto the pavers. Only after the water is managed does the pavement repair make sense. A compaction problem needs the sunken section lifted, the base excavated and re-compacted in lifts, and the pavers re-set. Doing the compaction repair without addressing the water is a repeat-visit guarantee, and we see it every monsoon season in Paradise.
Spot Repair vs. Full Base Remediation
The dollar difference between spot repair and full base remediation is real, and choosing the wrong level is expensive in both directions. Here’s the honest decision tree.
Spot repair is enough when:
- One to three pavers are moving, the rest ring solid.
- The compaction problem is confined to one wheel path.
- The base under the affected pavers is clean and holds shape when you dig a test hole.
- The edge restraints on that side of the driveway are still intact and level.
Full base remediation is the honest answer when:
- Hollow stones appear across the whole driveway or in multiple unrelated sections.
- The test hole shows base material that’s loose, wet, or doesn’t hold shape.
- Edge restraints are compromised along a long run.
- The pavement is more than a couple of inches sunk at a consistent grade.
- Drainage is wrong at the site level, not just one section.
We’ve had plenty of calls where a homeowner was quoted full replacement by one company and a spot repair by another, and both were wrong. The tap test and the test hole tell you which it is. If you want an honest read from a company whose name is on the truck, ask for one of our free estimates in Paradise; a written scope tells you which level of repair you actually need, and the written change order process means no number on the quote moves without a paper trail. A contractor who says “spot repair only” and hands you a written scope is telling you something. So is a contractor who quotes full replacement the same day he arrives, without a test hole.
What a Correct Base Layer Looks Like
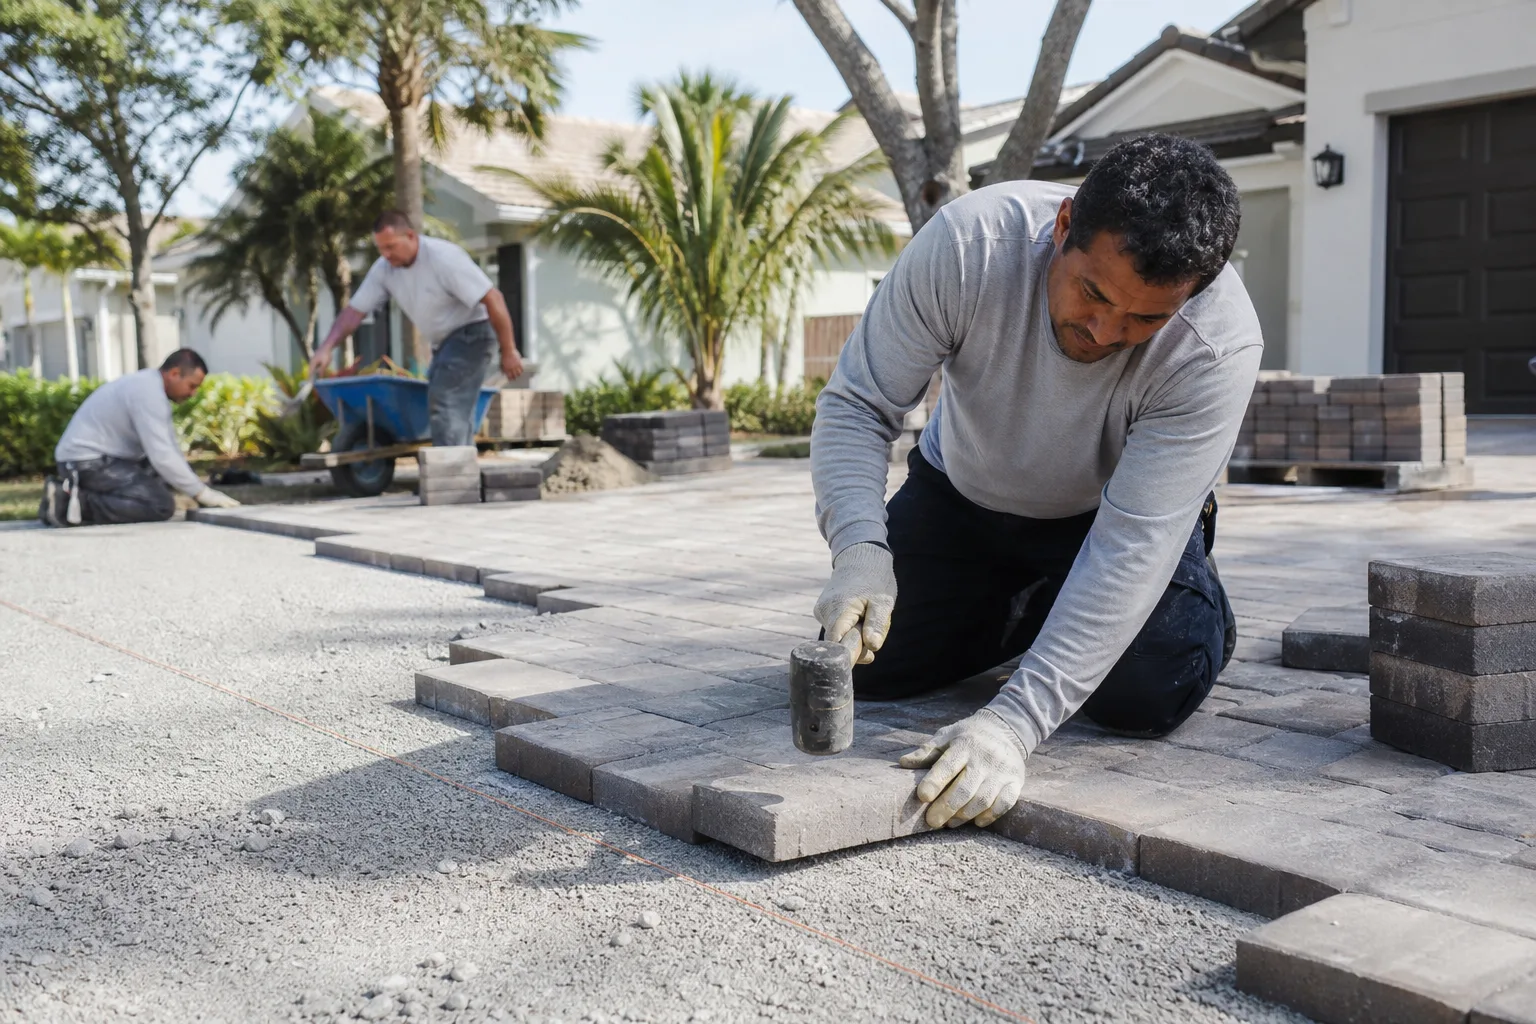
Almost every failure in this guide comes back to the base. Knowing what a correct base involves means you can spot a rushed install before it fails. Here’s the checklist we use on every hardscape install under the Barrett & Sons name.
- Excavation to the right depth. For a residential driveway, that’s typically 8 to 12 inches total excavation depending on pavers and use. Eight inches of compacted aggregate under 3 inches of bedding sand under the pavers is a common correct spec for a driveway; the exact number depends on your subgrade.
- Geotextile fabric over the subgrade. Separates native soil from the aggregate base and stops fines pumping up into the base.
- Aggregate base installed in lifts. Typically 4-inch lifts, each compacted with a plate or vibratory compactor before the next lift goes down. One 8-inch pour compacted from the top is not the same as two 4-inch lifts. If you watch a contractor dump the whole base in and run the plate over it once, you know what you’re going to be fixing in two summers.
- Bedding layer screeded, not dumped. About 1 inch of coarse sand, screeded to the correct slope. Quikrete and Sakrete both make bedding products we use; the spec matters less than the screed.
- Edge restraints set in concrete. Covered earlier – this is not a plastic-clip job.
- Polymeric sand installed and activated correctly. Dry pavers, swept joints, proper misting, then curing without traffic.
- Permits and inspections. In Paradise, any hardscape work that affects drainage or touches the right-of-way has to be permitted correctly. If your contractor told you the permit was optional, that’s a problem you inherit. The permit inspector works for you, not for me – that’s why we like him.
If you’re planning a new driveway install and want to understand what the written scope should include, our guide to Driveway & Pavers in Paradise walks through it line by line.
Common Mistakes to Avoid
- Sealing over moving pavers. The most expensive mistake in this guide. Sealing a hollow paver hides the symptom, traps the moisture, and makes the eventual repair harder. Diagnose first, then seal only a stable pavement.
- Pressure-washing efflorescence. High pressure etches the paver face and permanently dulls the finish. If it’s efflorescence, the answer is moisture control underneath, not a blasting wand.
- Using the wrong stain treatment. Rust remover on mildew bleaches the paver. Bleach on rust sets it. Match the product to the stain before you spray anything.
- Replacing plastic edge clips with the same plastic edge clips. Same age, same failure. If the edge failed, the answer is a concrete restraint, not a fresh plastic clip.
- Dumping sand into joints without activating polymeric product. The sand looks like it’s holding until the first 110-degree week in Paradise. Activated polymeric sand or honest coarse joint sand, not drop-and-sweep.
- Skipping the test hole. We see quotes issued same-day with no excavation to see what the actual base looks like. Don’t accept a number that came without a look.
- Believing a permit was optional. In Paradise, a contractor who told you it wasn’t needed cost you more than the permit fee. Every eligible job we run pulls the permit and signs the inspection.
See the difference
 Before
 After
 Before
 After
 Before
 After
When to Call a Professional
Some of the work in this guide is genuinely in your wheelhouse – the tap test, the visual stain ID, the small spot cleaning. Some of it isn’t. Call a professional when the pavement has more than three hollow pavers, when the edge restraint is compromised along an extended run, when water has visibly undermined the base, or when you’ve identified the problem as drainage and you don’t have an obvious grade fix. Anything involving lifting pavers, excavating base, or pouring a concrete edge is work where the wrong first decision costs more than the whole repair done right. We’ve also seen too many homeowners hurt themselves lifting pavers without proper gear; call it in. Barrett & Sons Construction Paradise offers free estimates in Paradise – call (855) 596-7029 to schedule one. A written scope with line-item pricing comes back to you, no surprises, no change orders unless you sign for them.
Frequently Asked Questions
Spot repairs on one to three pavers in Paradise typically run in the $200 to $600 range including materials and re-sanding. Full base remediation on a section or full driveway is a larger investment that depends on square footage, excavation depth, and whether drainage work is involved. Call (855) 596-7029 for a written estimate – estimates are free, and the number only moves if a written change order moves it.
No. Sealing a moving paver hides the symptom, traps the moisture, and makes the eventual repair harder. Diagnose the failure first – hollow spot, drainage, edge restraint – then repair, then seal. Sealing a stable pavement is fine. Sealing a moving one wastes the sealer and delays the fix.
Common causes in Paradise are compaction failure in the original base (installed too shallow or in one lift rather than compacted lifts), edge restraint failure that lets the field spread, and irrigation or monsoon water pooling under the pavement. The tap test and a small test hole tell you which one you have.
Efflorescence is powdery white, brushes off with a dry finger, and returns after moisture. Mold is dark green or black, usually in shaded areas, and needs a soap-and-water wash. If it’s rust-colored, it’s a mineral stain and neither treatment applies. Match the treatment to the stain before you apply anything.
High-solid-content polymeric sand, fully activated per manufacturer instructions on dry pavers, installed once. Quikrete and Sakrete both make poly-sand products we install routinely. Ordinary drop-and-sweep sand and improperly activated box-store poly-sand both fail within a season in our climate.
Yes – on any eligible job, we pull the permit and sign the inspection. If a contractor told you the permit was optional for work affecting drainage or touching the right-of-way, that’s a problem you inherit later. The permit inspector works for you, not for us.
The Bottom Line
Rocking pavers, efflorescence blooms, ant highways, and sagging edges are all symptoms of the same underlying question: was the base built correctly? Diagnose with the tap test, identify the stain before you treat it, check the edge restraints each spring, and be honest about whether the failure is drainage (water management fix) or compaction (base fix). Seal only what’s stable. If a repair quote comes back without a test hole and a written scope, that’s information. If you want an honest read on what your driveway in Paradise actually needs, our team is a phone call away. If your project grows beyond pavers – a new fence, a workshop, an ADU – we can help with Fence Installation in Paradise and Home Additions & ADU in Paradise as well. Start at the Barrett & Sons Construction Paradise home page to see everything else we do.
When you’re ready to price it properly rather than guess, call (855) 596-7029 for a free estimate. Every scope arrives in writing, every change order arrives before the work moves, and every completed job is backed by the written 90-Day Done Right Promise – one call and Tom comes back to make it right.
Written by the team at Barrett & Sons Construction Paradise.